In this tutorial I'm going to explain how to building an ASP.NET MVC 4 Web application using Visual Studio 2010 Ultimate with Service Pack 1 . Before you going to create a MVC 4 project we know about MVC and MVC 4.
What is ASP.NET MVC?
MVC stands for model-view-controller. MVC is a pattern for developing applications that are well architected, testable and easy to maintain. MVC-based applications contain:
Controllers: Classes that handle incoming requests to the application, retrieve model data, and then specify view templates that return a response to the client.
Models: Classes that represent the data of the application and that use validation logic to enforce business rules for that data.
Views: Template files that your application uses to dynamically generate HTML responses.
What is ASP.NET MVC 4?
According to
asp.net ASP.NET MVC 4 is a framework for building scalable, standards-based web applications using well-established design patterns and the power of ASP.NET and the .NET Framework. It installs side-by-side with ASP.NET MVC 3.
Software Requirements for ASP.NET MVC 4 :
Before you start, make sure you've installed the prerequisites listed below. You can install all of them by clicking the following links:
- PowerShell 2.0
- .NET version 4.0
- Visual Studio 2010 with Service Pack 1 (or)
- Visual Web Developer Express 2010 with Service Pack 1.
- ODBC .NET Data Provider
- SQL Server Compact 4.0 (If you using SQL database)
- SQL Server Compact Toolbox
And you can
Create new project with asp.net mvc 4 using C#:
Follow the below steps to Create new web application with asp.net mvc 4 using C#
Step 1: Open Visual Studio 2010 Ultimate if not already opened.
 Step 2:
 Select the File --> New --> Project menu command. In the New Project dialog, select the Visual C# --> Web template on the left pane tree, and choose ASP.NET MVC 4 Web Application. Name the project MVC4Sampleproject, select a location (or leave the default) and click OK.
 Step 3:
 In the New ASP.NET MVC 4 Project dialog box, select the Internet Application project template and click OK. Make sure you have Razor selected as the View Engine.
 Step 4:
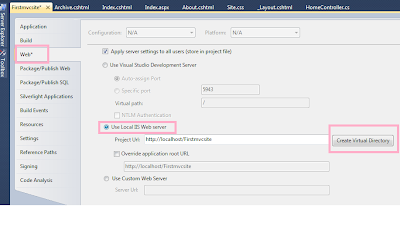
 That's it. A new asp.net mvc 4 project was created by you. Now Press F5 to run the solution, and then browse to the following URL http://localhost:[port]/MVC4Sampleproject/(the [port] value depends on the current port where the application was launched). If you want to remove the port number from your asp.net mvc 4 project you need to
Running your ASP.NET MVC app from a virtual directory in IIS7
 Sample asp.net mvc 4 web page:
This is a sample screen shot for an asp.net mvc 4 web page.

And you can
download the sample asp.net mvc 4 web application source code from here.
If you want learn more about asp.net mvc 4. If you want to create an asp.net mvc 4 application with models - Views - Controllers. Here you can find a very good tutorial
http://www.asp.net/mvc/tutorials/mvc-4/getting-started-with-aspnet-mvc4/intro-to-aspnet-mvc-4
|
\|/
Don't forgot to share this knowledge to your friends. Cheers!
 Sometime you might come into a situation to remove the specials characters in the textbox while users give the input. Below JavaScript sample code will help you to remove those char from textbox. The following script delete all the special character on textbox "onkeyup" event.


